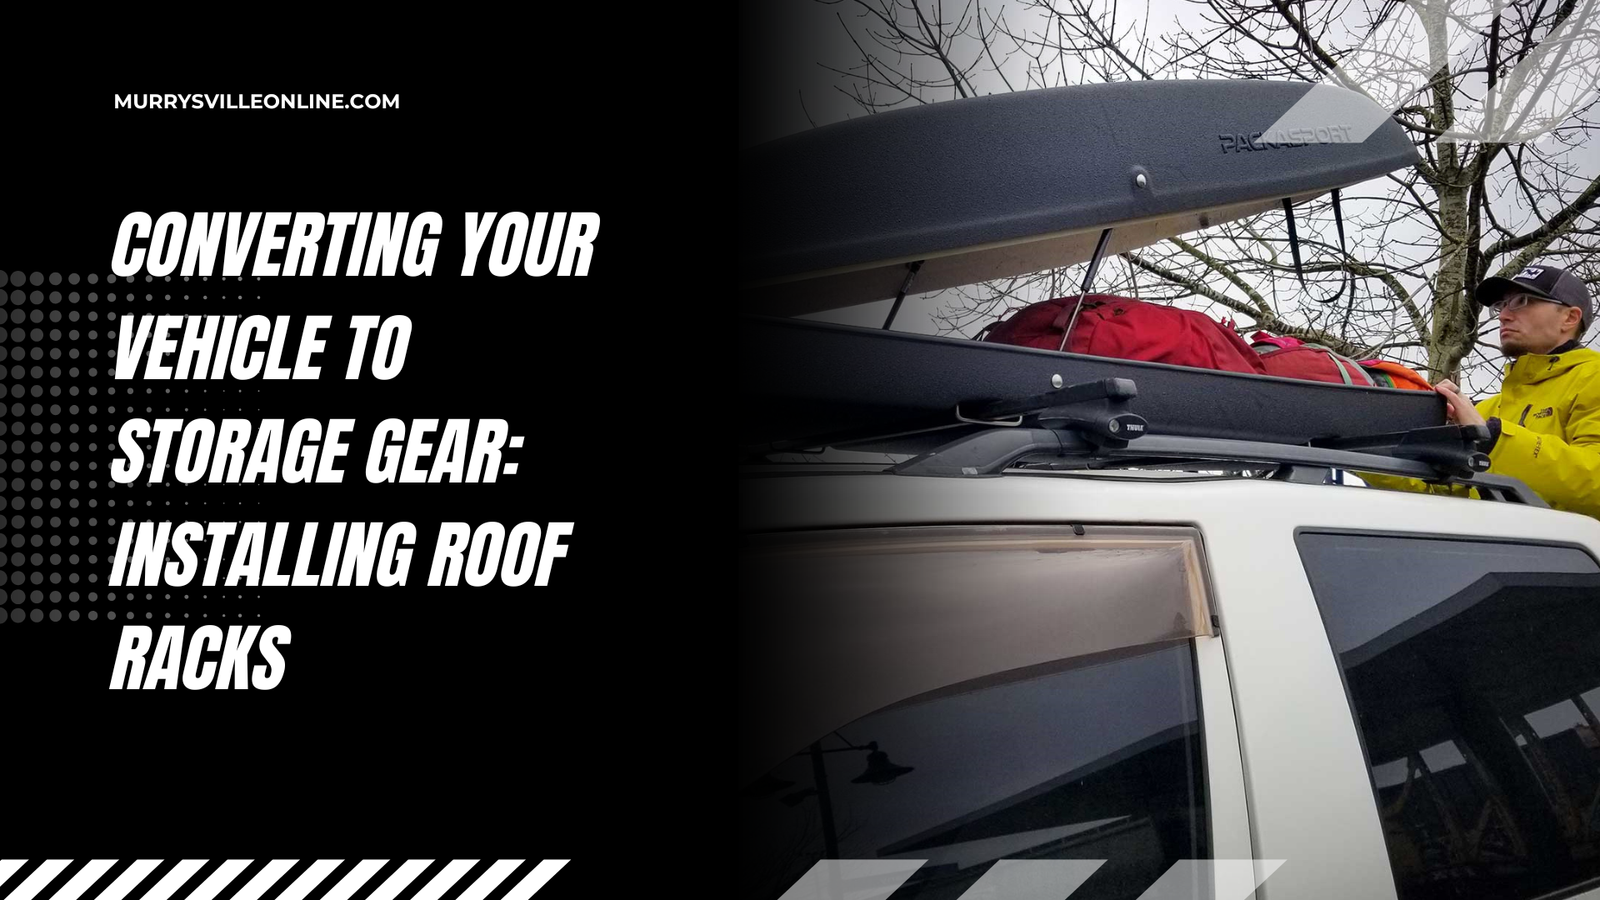

A roof rack is an excellent accessory for any vehicle, providing additional storage for road trips, camping trips, or the hauling of large items. To own a roof rack on your vehicle, stocked with bikes, kayaks, duffel bags, or a roof-top tent, is simpler and quicker. Continue reading below for our step-by-step guide on fitting a roof rack to your vehicle safely and securely.
1. Choose the Appropriate Roof Rack for Your Vehicle
You need to choose the right roof rack for your vehicle before you install it. Roof racks exist in different models and designs that differ from the car. There are cars with pre-existing mounting points at the time of manufacture or side rails that go up, hence are easy to mount. If such mounting points or rails don’t exist on the vehicle, you may have to install a clamp-on system on the door frame or drill through the roof.
Also consider what type of cargo you will be hauling. If you’ll be transporting bikes, you’ll want to use a bike rack accessory. If you’ll be transporting a kayak or canoe, use a system with crossbars that have padding. Consider your roof rack weight capacity and ensure it’ll be high enough so as not to harm your vehicle.
2. Have the Required Tools and Materials
You will need some general tools and materials to install a roof rack. A wrench, screwdriver, measuring tape, and perhaps a rubber mallet are required for most installations. Certain racks have special mounting hardware, so refer to the installation manual prior to commencing.
It is also advisable to have all the protective materials like foam padding or rubber strips to prevent scratching of your car paint. Having all the components prepared will simplify the installation and prevent delays.
3. Clean the Roof Surface Before Installation
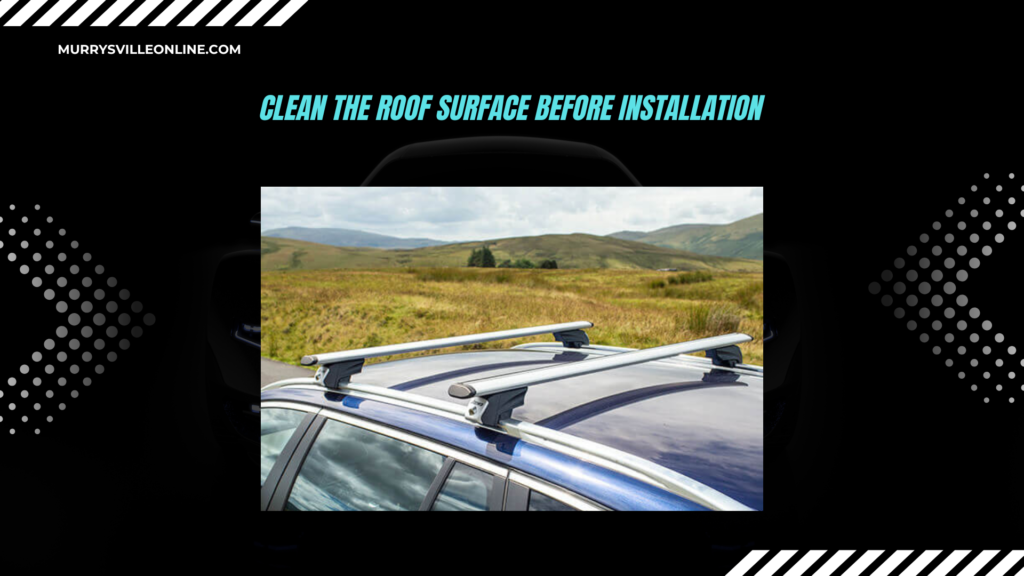
Wash the roof of your vehicle clean of dust, dirt, and debris prior to installing the roof rack. This creates a clean surface for an attachment point where the mounting system will stick and not scratch or get damaged while mounting.
Use a microfiber towel and a mild car cleaner to wipe the area where the rack will be placed. A clean surface will make rubber pads or adhesive stick better and remain more firmly in place if they need to be used on your roof rack.
4. Mount and Install the Crossbars
The crossbars are the underside of your roof rack, and hence should be installed in their proper position. Install them one beside the other parallel to each other equidistant to provide the maximum stability to your load. There generally is a spacing guide on most vehicles, so do refer in your car manual or your manufacturer’s rack manual.
Secure crossbars by tightening screws or mounting brackets. In a clamp-type system, make sure that every clamp is securely attached to the roof so that the clamps will not shift. Don’t over-tighten because this will scratch the brackets or your car’s roof.
5. Mount Roof Rack Feet or Towers
Roof rack towers or feet provide extra support and serve to stabilize the rack. If your vehicle has already raised rails, then the feet will clamp firmly over them. Otherwise, the feet can be fitted through some mounting points or door jamb clamps.
Install and level all feet or towers upon installation with crossbars. Install them but do not tighten so much, since this will put too much weight on your roof. Tighten the feet, then shake carefully to check there is no movement.
6. Double-Check Alignment and Stability
Having fitted the roof rack, the second highly critical activity is adjusting and stabilizing the roof rack. Inspect all areas of fixation for safety to your car. Position, if required, to ensure that weight would be properly distributed.
Try to apply gentle pressure on the rack to check how stable it is. If it loosens, tighten the bolts or clamps again. A stable and level roof rack is safer to drive with and can avoid damaging your cargo.
7. Load the Roof Rack Lightly
Test it initially with light loads prior to loading heavy loads onto your roof rack. Place a light bag or small load to test movement and stability. Drive for a short distance and listen for any strange noises, like rattling or whistling sounds, that may be produced by loose parts.
If you do find that you have some instability, stabilize it accordingly prior to loading heavier loads. Pre-testing the installation avoids possible aggravations with larger loads for long hauls.
8. Master Proper Cargo Tie-Down Practices
When loading cargo onto your roof rack, apply the proper tie-down methods and secure your cargo. Ratchet straps, bungee cords, or rope can be used to secure products but should be tightened so they will not shift during transport.
Distribute weight uniformly over crossbars, and never go over the top of the rack. On equipment like bicycles or kayaks, include extra padding or special mounts to act as shock absorption and stability buffers.
9. Inspect and Service Your Roof Rack Regularly

To maintain your roof rack in good condition, check and service it regularly. Check for loose bolts, corrosion, or wear. If your rack is exposed to extreme weather conditions, clean it occasionally to avoid corrosion.
Tighten mounting points and verify attachments for security prior to long journeys. Periodic servicing increases the life of your roof rack and allows for safe transportation of commodities.
Conclusion
Mounting a roof rack on your vehicle is an affordable way of increasing storage space and adding travel adventure. From the procedures in this guidebook, you will be in a position to achieve a safe and secure fit such that you will enjoy a guarantee of carrying equipment in comfort. Correct loading and periodic maintenance will put your roof rack in top running condition, and it will remain a good bet for your automobile for its lifespan. Whether your destination is the beach, your favorite camping resort, or on an adventure day out, if your roof rack is installed, your car turns into a storing machine!